It is very important to learn the right technique for making good pipe joints. Good joints last up to life span of pipe (~ 40 years) without any leaks. Poor joint preparation can result in failure.
Step: 1. Shake cement container prior to use. If jelly-like, do not use. Keep container closed when not in use. Avoid eye and skin contact. Wear safety glasses with side shields and rubber gloves.
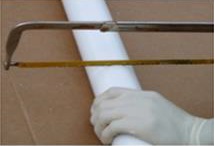
Step: 2. Pipe must be cut as square (straight) as possible. Use a hand saw OR appropriate pipe cutting tool. Remove all burrs from inside and outside of the pipe using file or de-burring tool.
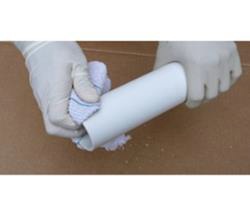
Step: 3. Remove dirt, grease and moisture by dry clean cloth OR primer/cleaner.
Step: 4. Check pipe and fitting for dry fit before cementing. For interference fit, pipe must go easily into the fitting about ¼” to ¾” of the way.
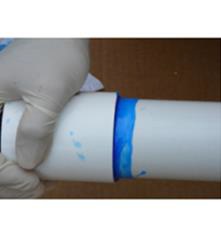
Step: 5. Then, aggressively apply the cement onto the end of the pipe (equal to the depth of the fitting socket).
Step: 6. Aggressively apply the solvent cement inside the fitting socket.
Step: 7. Twist the pipe 1/8” to 1/4” turn as you insert in the fitting. Stop when it reaches to the bottom. Hold the pipe and fitting together for about 30 seconds to avoid push out.
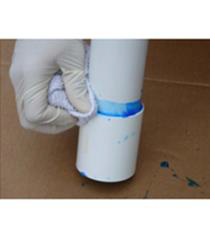
Step: 8. After assembly, a joint should have a ring of cement completely around the juncture. Wipe off the excess cement. Joint is ready.
Allow 5 minutes for good handling strength and 60 minutes cure for good bond strength. Allow 2 hours cure time before pressure testing up to 12.65 kg/cm2 (180 psi). Please follow the set-time and cure time chart.